VOICE2TEXT AI
User Guide
Voice2Text
From voice to text, in any language.
Transcribe audio and video files with artificial intelligence, edit the text and save it wherever you like.
Offline Whisper12 formatsCloud9 languages
User Guide
From voice to text, in any language.
Transcribe audio and video files with artificial intelligence, edit the text and save it wherever you like.
Voice2Text turns audio and video recordings into written text. Interviews, meetings, lectures, podcasts, voice messages: drop the file into the window, choose the AI engine and within minutes you have the text, ready to edit and save.
macOS 11 or later (Apple or Intel Mac), 64-bit Windows 10/11, or 64-bit Linux (Ubuntu, Debian, Fedora and derivatives). For offline Whisper at least 8 GB of memory is recommended; online services only need a connection.
Download the file for your system and install it like any other program.
Open Voice2Text_1.1.1_universal.dmg and drag the Voice2Text icon into the Applications folder. On first launch macOS may say the developer cannot be verified: open System Settings → Privacy & Security and choose Open Anyway, or right-click the app and choose Open. You only need to do this once.
Run Voice2Text_1.1.1_x64-setup.exe. If the blue Windows SmartScreen window appears, click More info and then Run anyway. Installation does not require administrator rights.
On Ubuntu and Debian install the .deb package (double-click or sudo apt install ./Voice2Text_1.1.1_amd64.deb); on Fedora the .rpm package. Alternatively make the .AppImage executable (chmod +x) and run it.
brew install ffmpeg on Mac, winget install ffmpeg on Windows, sudo apt install ffmpeg on Linux. It is found automatically.All the work happens in a single window: the list of files on the left, the selected file in the middle.
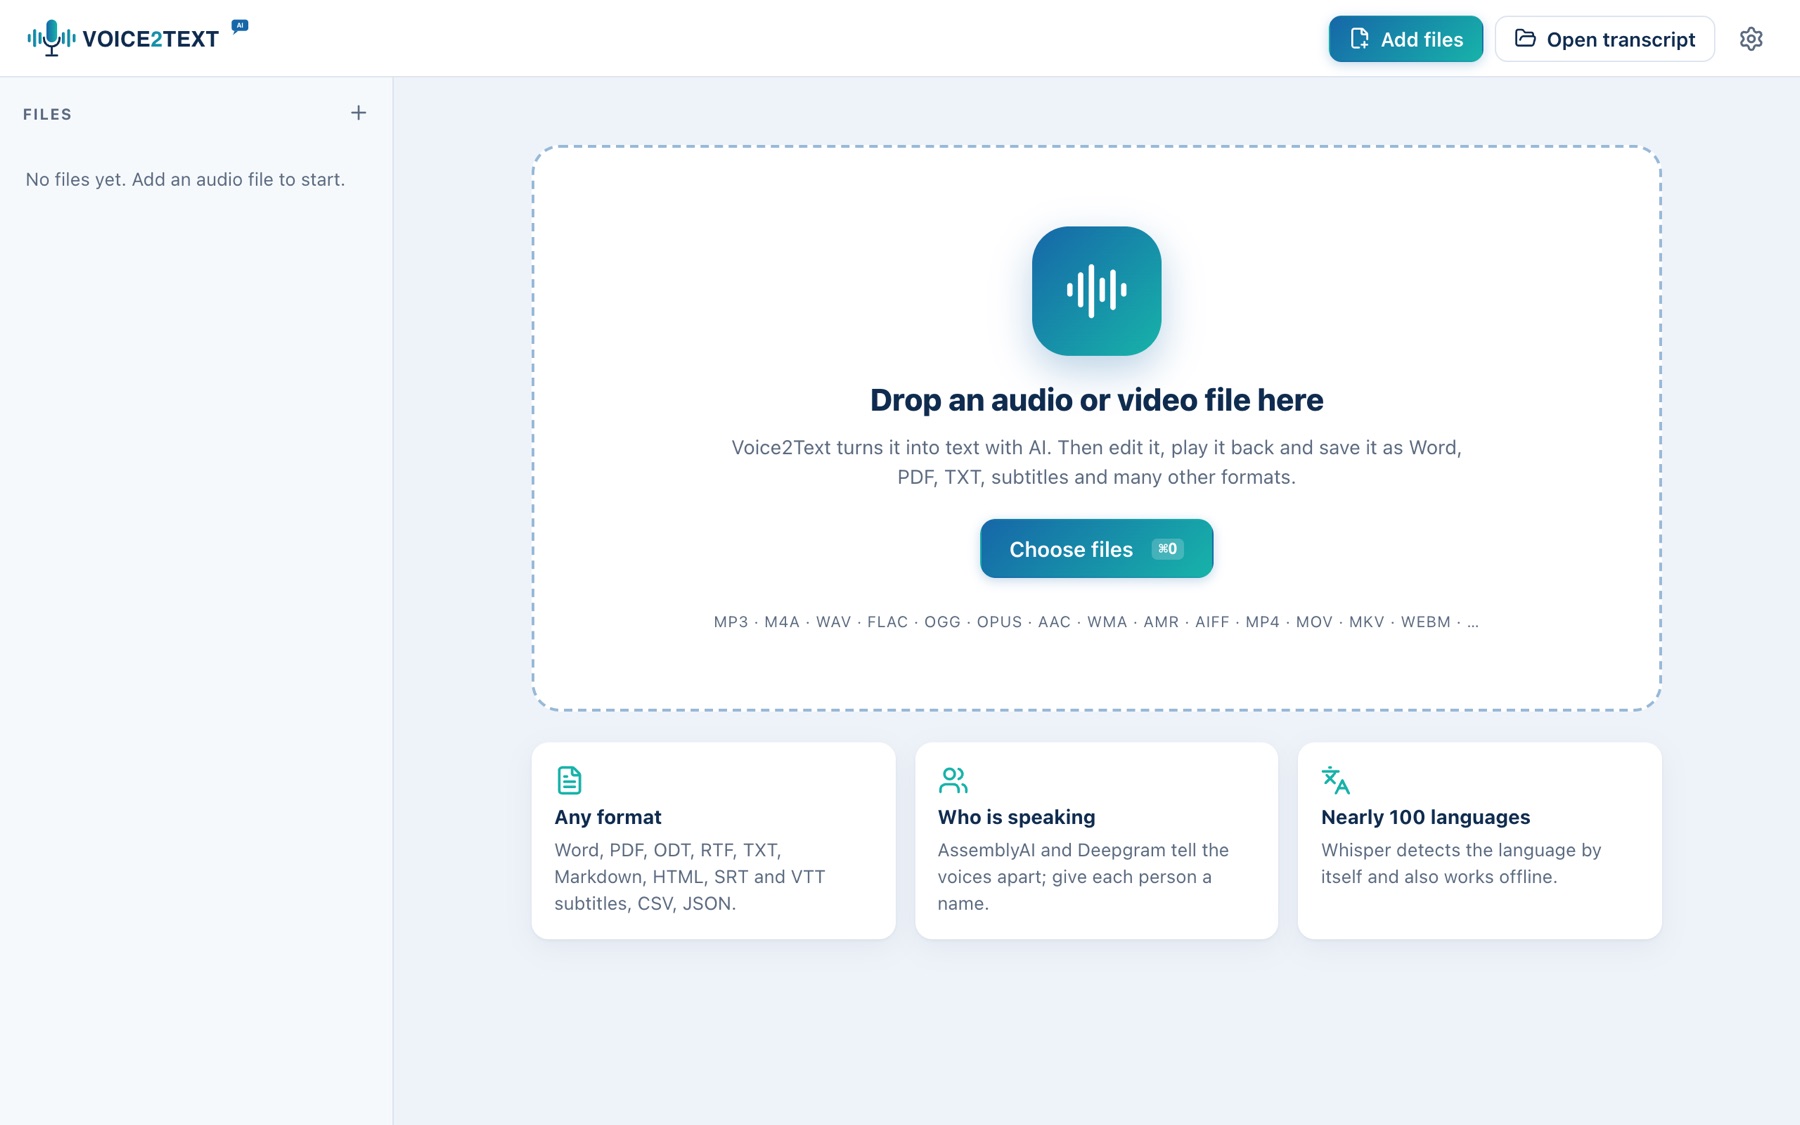
.v2t project) and the Settings gear.Drag one or more audio or video files onto the window, or use Add files (⌘O / Ctrl+O). Add as many as you like: they are transcribed one after another. Dropping a .v2t file reopens a saved transcript.
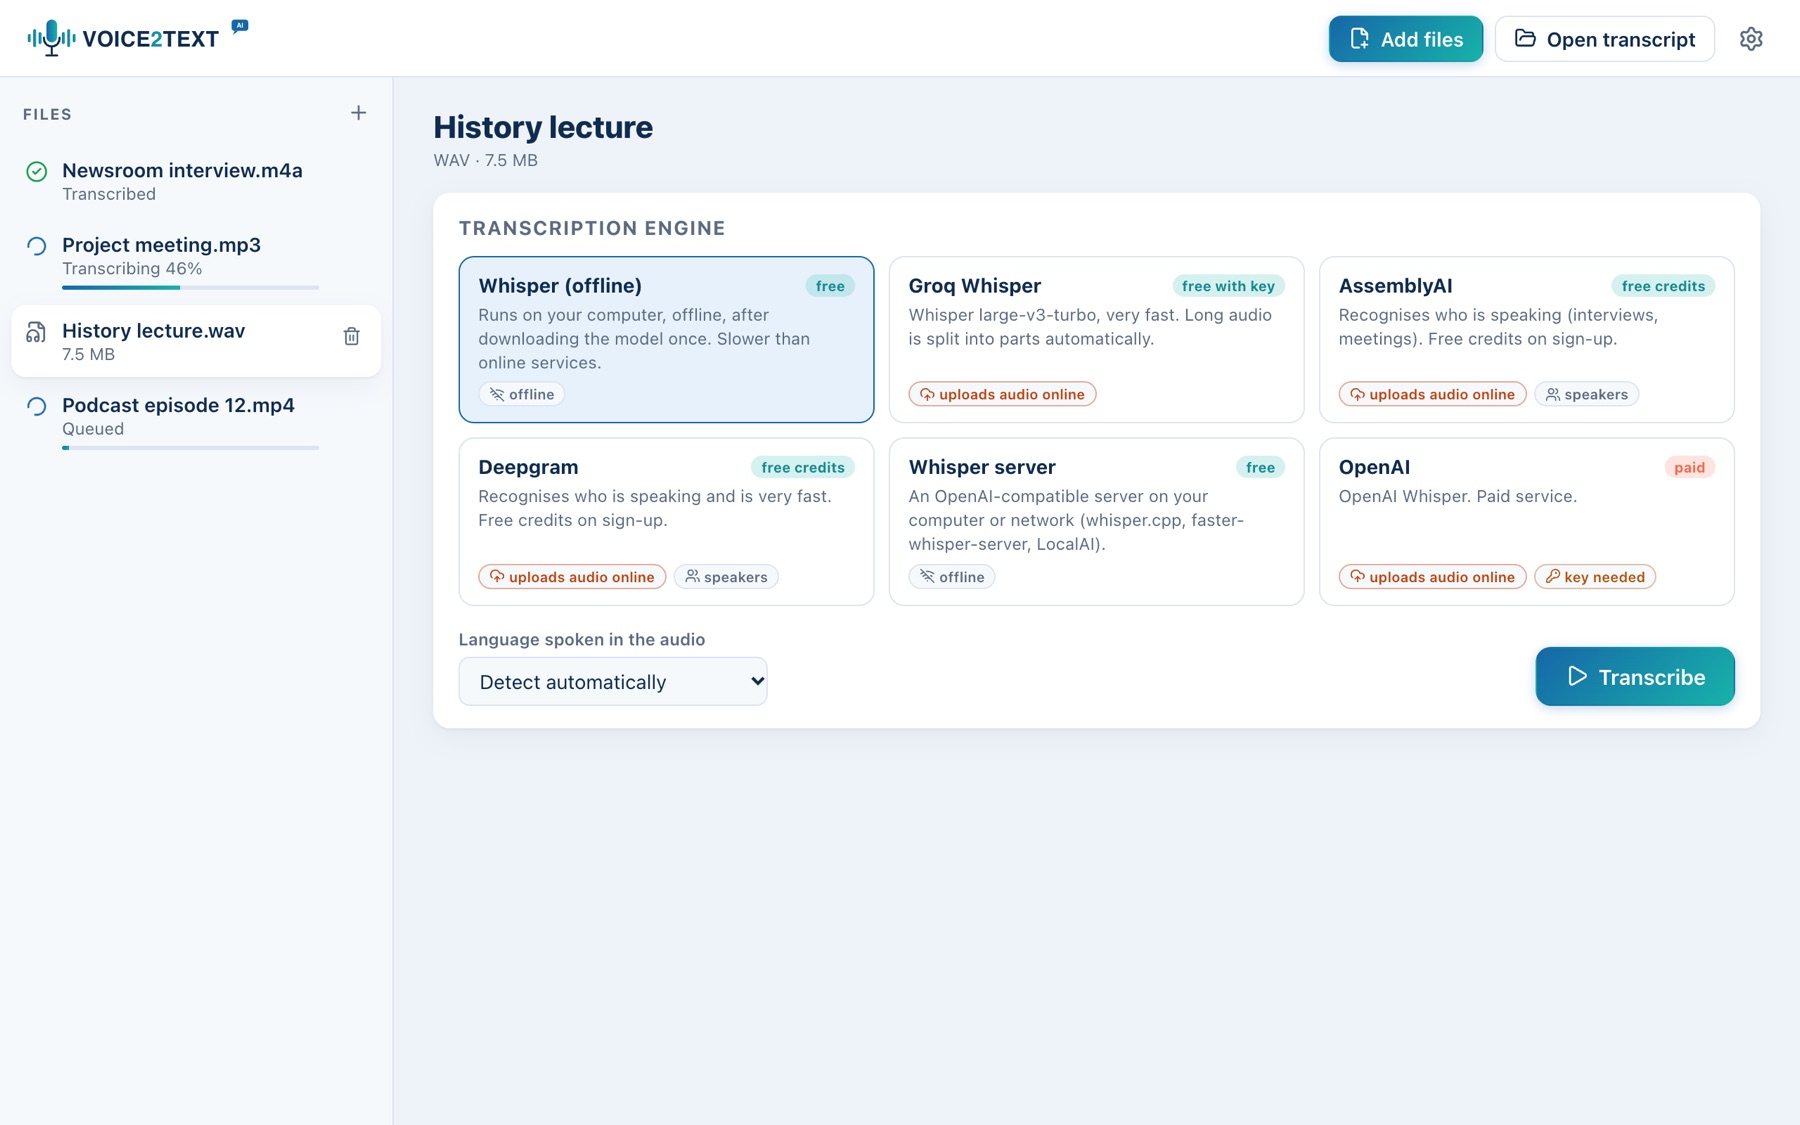
Before transcribing, choose who does the work: Whisper on your computer or an online service.
| Engine | Cost | Features |
|---|---|---|
| Whisper (offline) | free | Works without Internet; the model is downloaded once (45 to 600 MB). Slower than online services. |
| Groq Whisper | free with key | Very fast; long audio is split into parts automatically. |
| AssemblyAI | free credits | Recognises who is speaking. Ideal for interviews and meetings. |
| Deepgram | free credits | Recognises who is speaking and is very fast. |
| Whisper server | free | A Whisper server on your computer or network (whisper.cpp, faster-whisper-server, LocalAI). |
| OpenAI | paid | OpenAI Whisper. |
With Detect automatically Voice2Text works out the spoken language by itself. If you know it, choose it: the result is more accurate, especially in the first seconds.
Groq, AssemblyAI, Deepgram and OpenAI need a personal key: in Settings → Engines you find a field for each and a “get a key” link. Signing up to Groq is free; AssemblyAI and Deepgram give credits on sign-up.
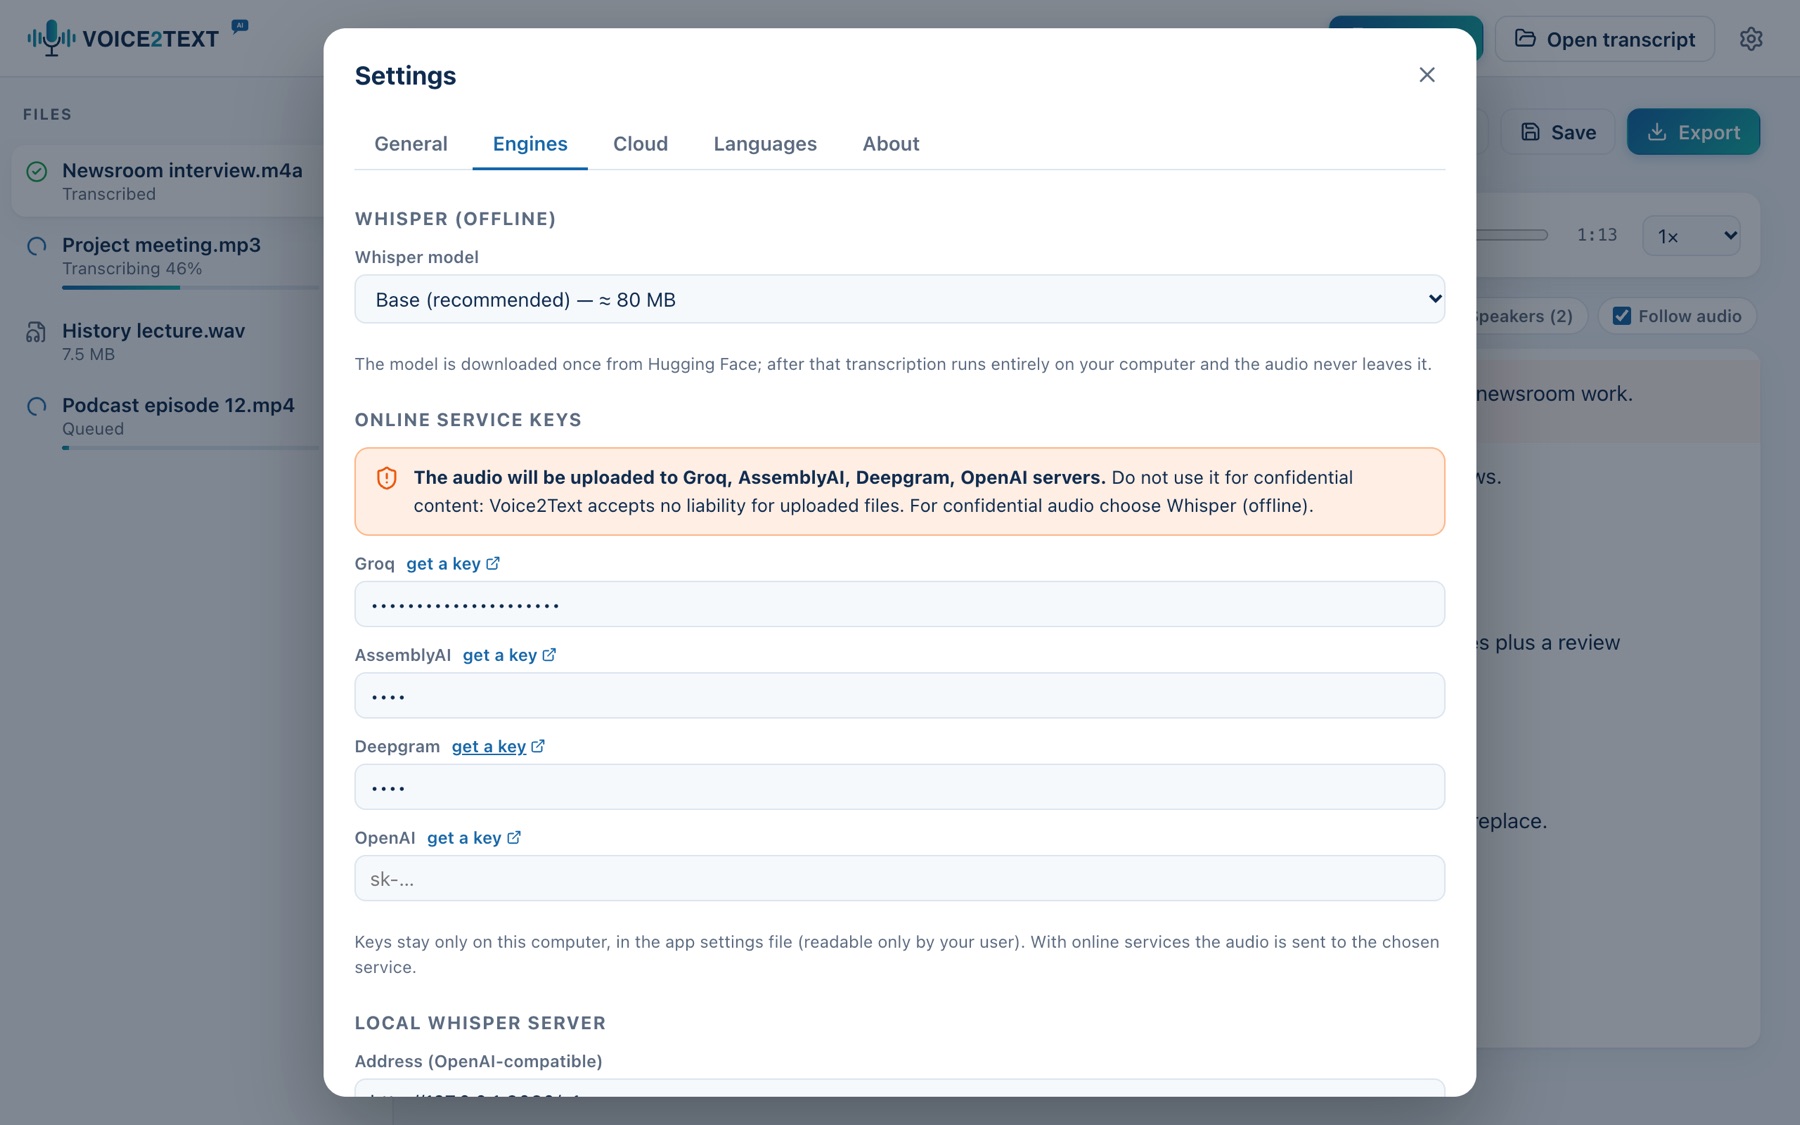
Press Transcribe to start. With several files waiting, Transcribe all also appears in the sidebar.
When you use an online AI service, the audio file is uploaded over the Internet. Voice2Text tells you so clearly and asks for your confirmation.
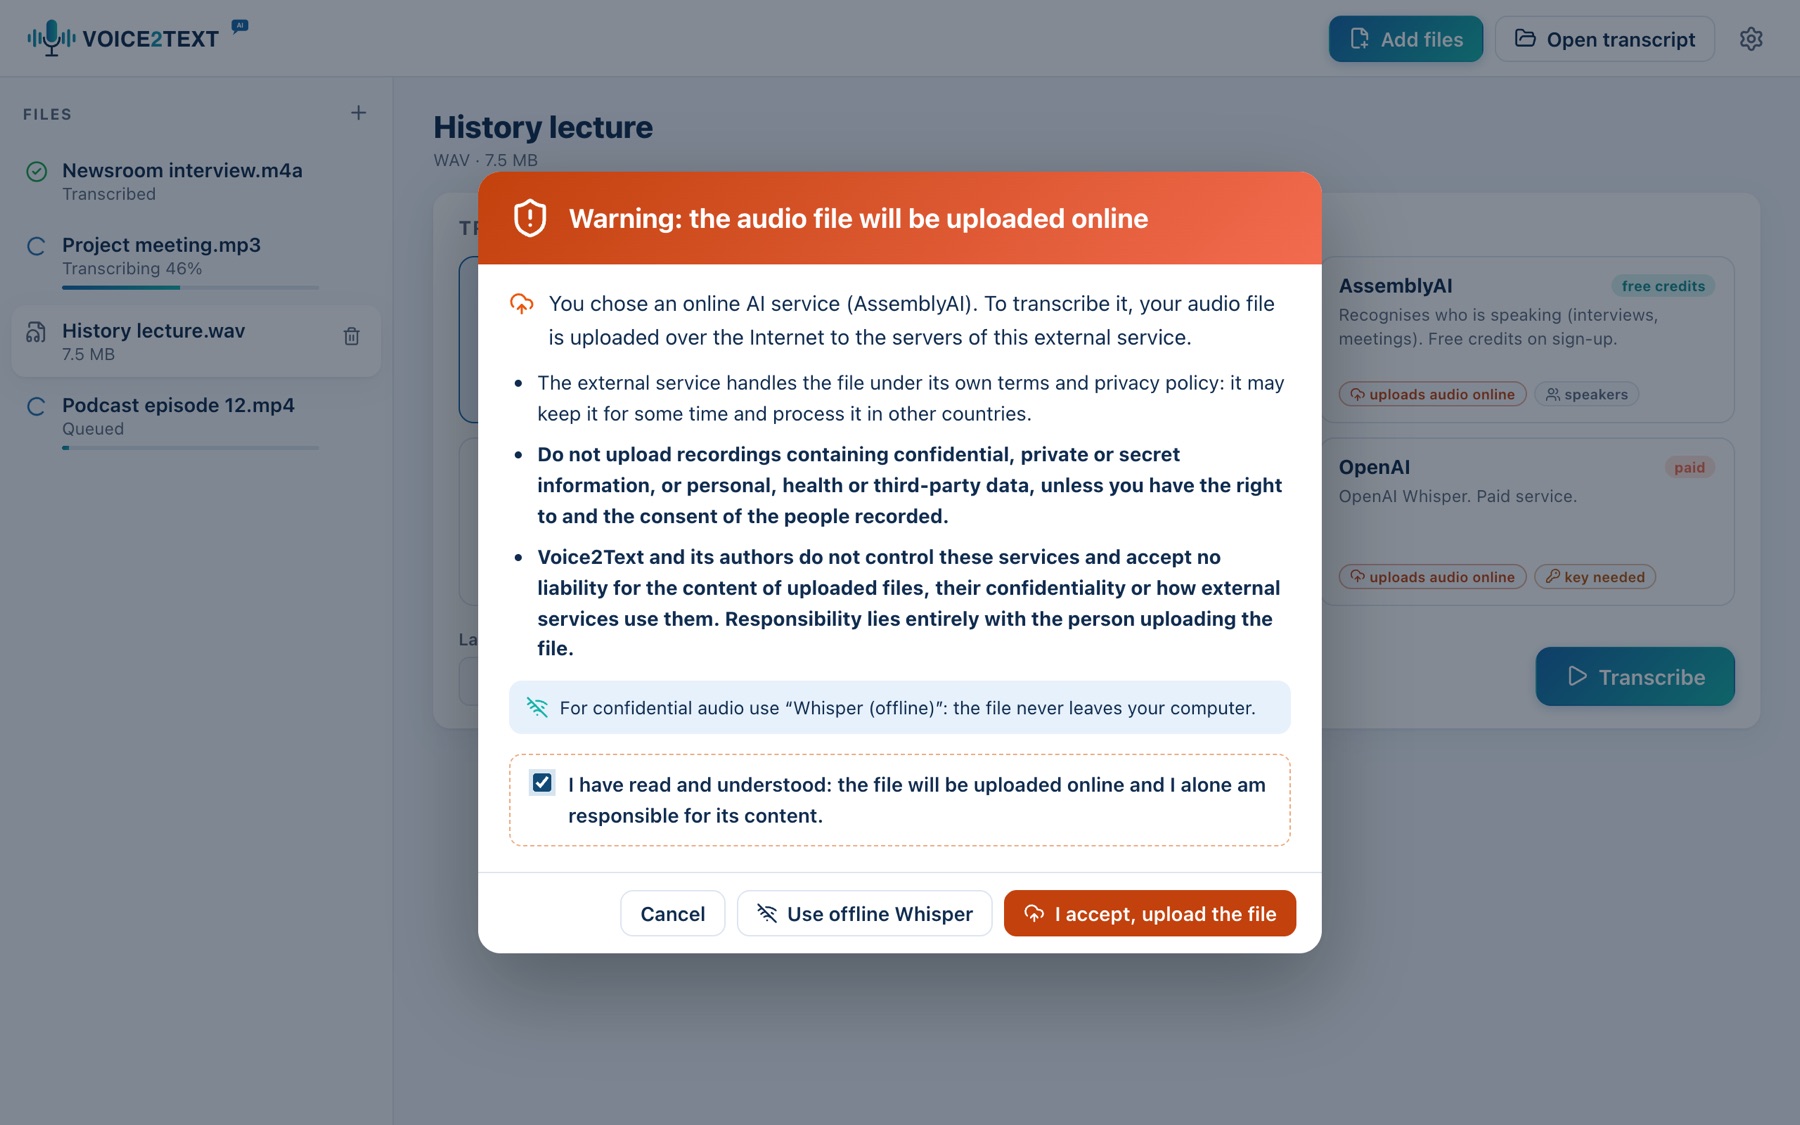
The first time you use Groq, AssemblyAI, Deepgram or OpenAI this warning appears. To continue you must tick “I have read and understood”; alternatively you can switch straight to offline Whisper.
The audio file is uploaded to the external service’s servers, which handle it under their own terms and privacy policy: they may keep it for some time and process it in other countries.
Do not upload recordings with confidential information, private or secret information, or personal, health or third-party data, unless you have the right to and the consent of the people recorded.
Voice2Text and its authors accept no liability for the content of uploaded files, their confidentiality or how external services use them. Responsibility lies entirely with the person uploading the file.
Acceptance applies to that single service and is recorded with the date. While an online service is selected, an orange box reminds you of it. In Settings → About you can reread the warning and make it appear again.
Voice2Text shows at every moment how far the work has got.
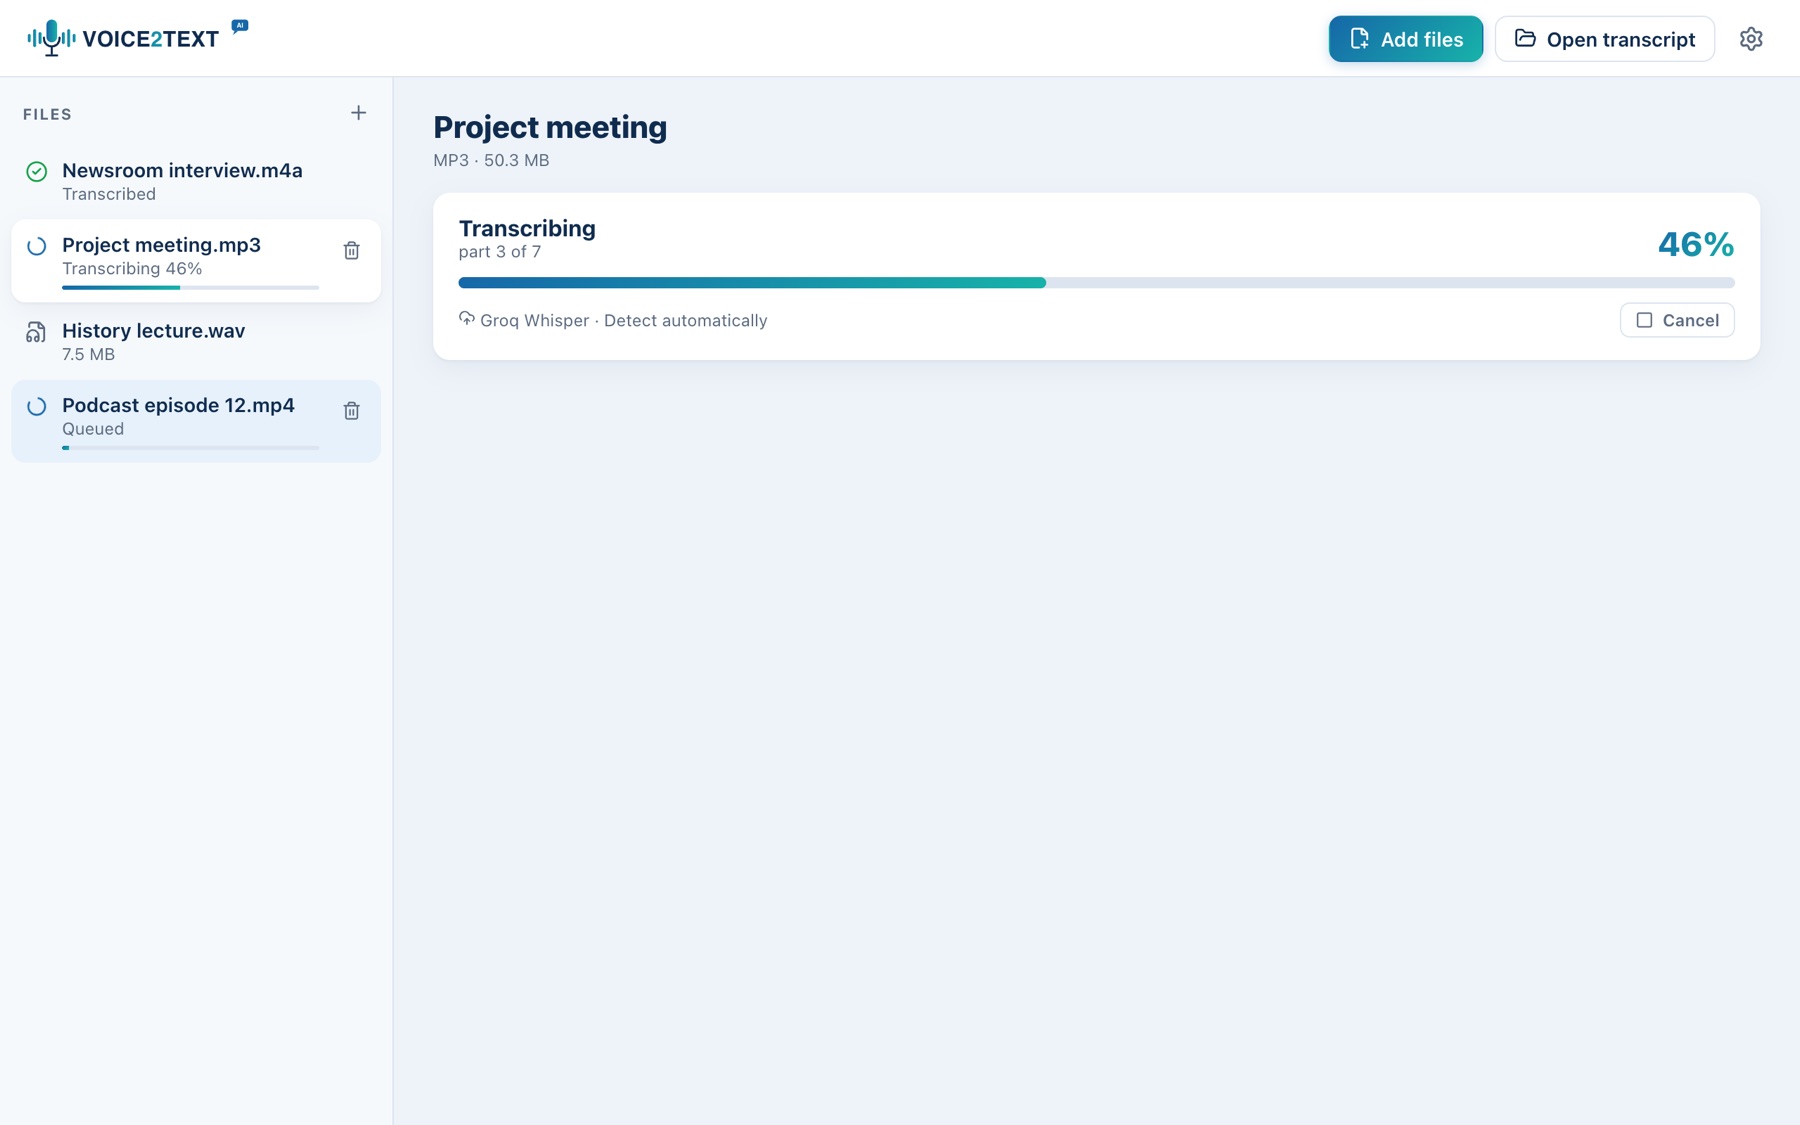
You can cancel at any time with Cancel, keep working on other files and leave the transcription running: when the text is ready you get a notification.
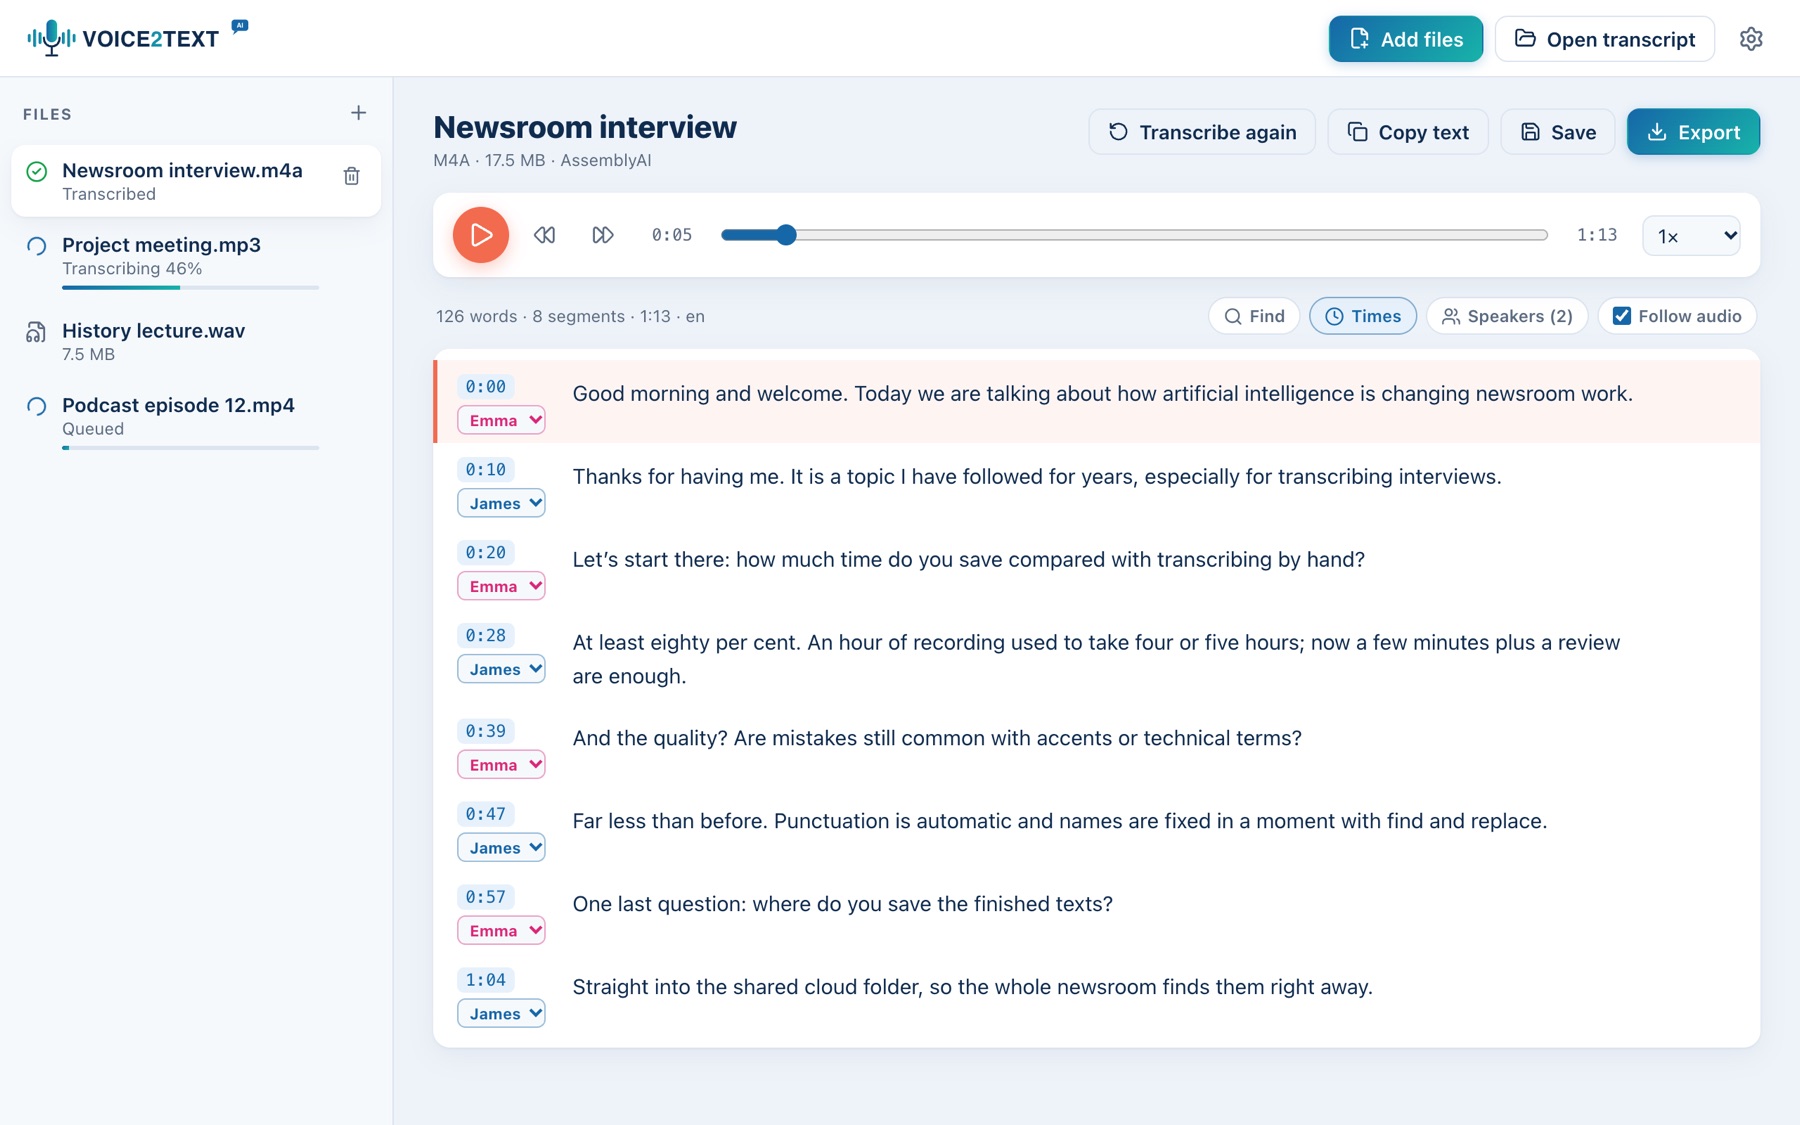
The text is split into sentences, each with its time and, when recognised, the person speaking.
The player at the top plays the original audio: Space plays and pauses (when you are not typing), the buttons jump 5 seconds and you can pick a speed from 0.75× to 2×. Click the time of a sentence to hear it; with Follow audio the sentence being played always stays in view.
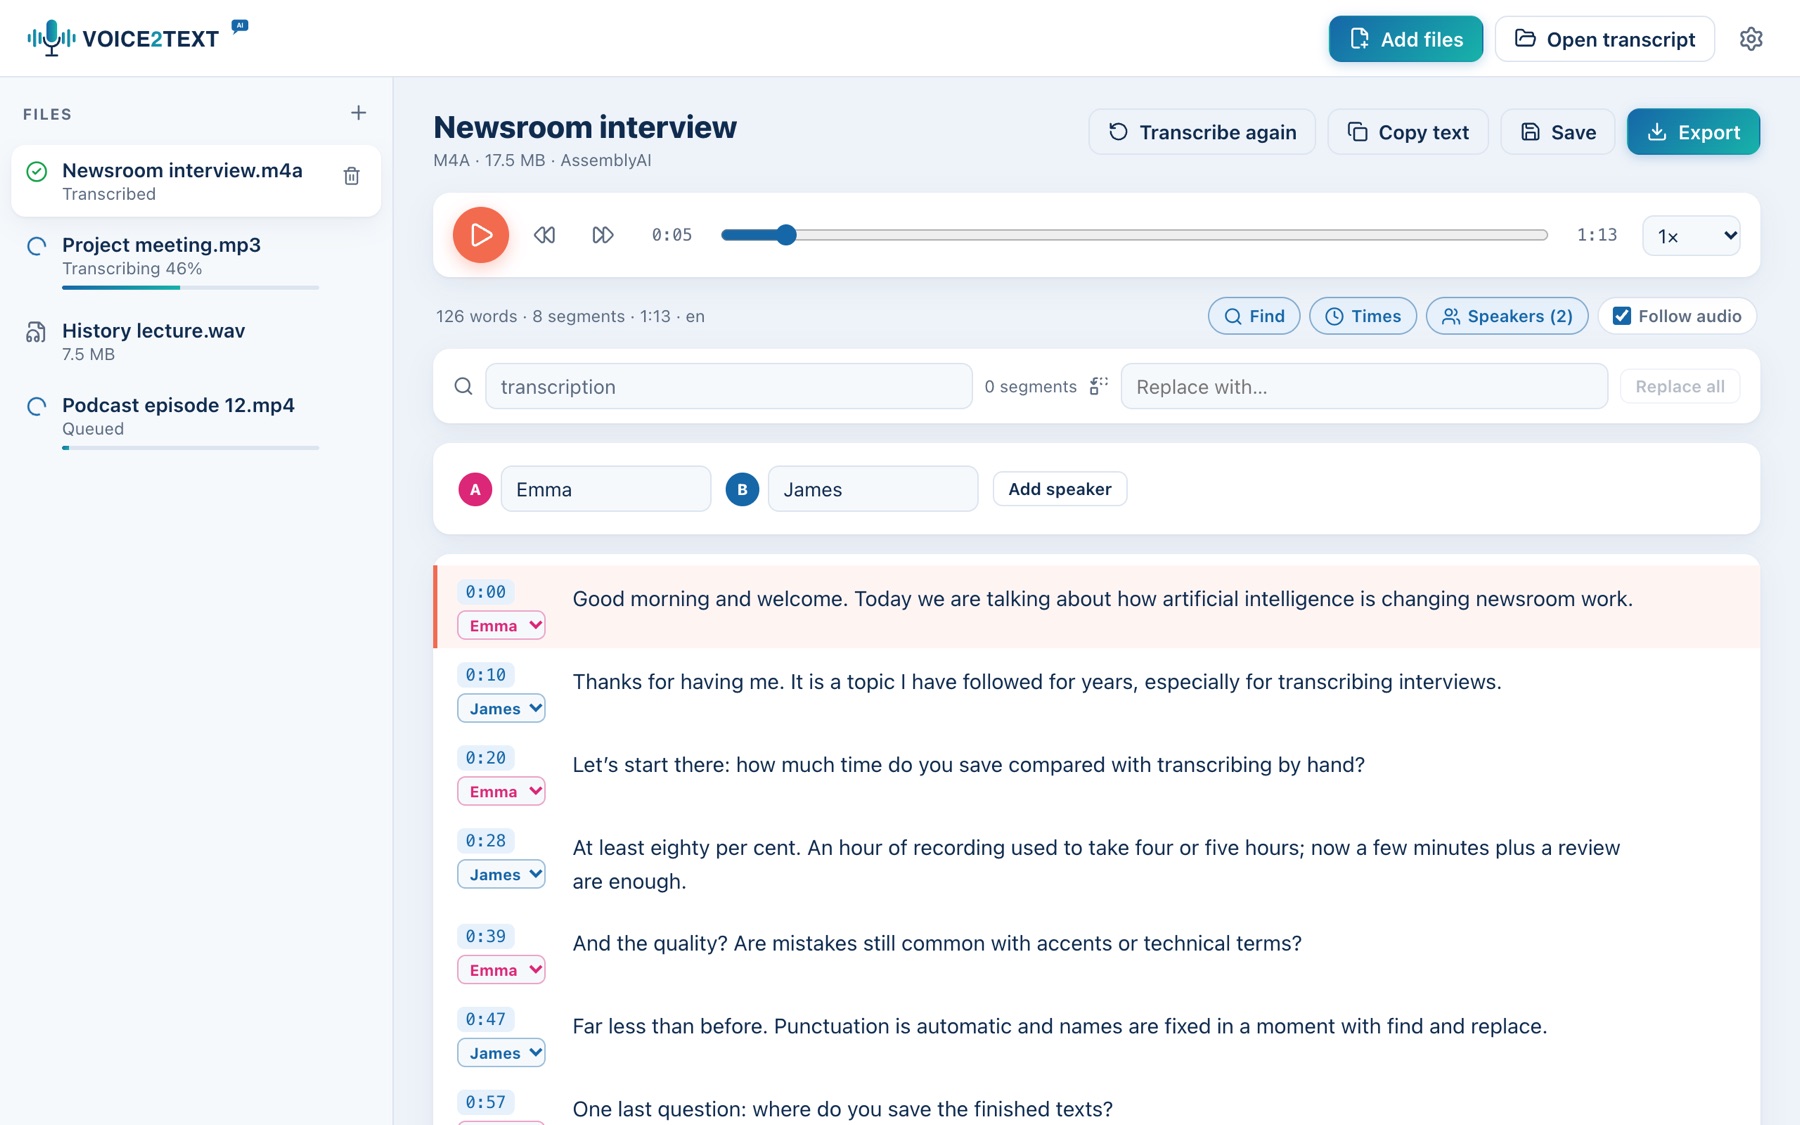
Find (⌘F / Ctrl+F) highlights the sentences containing the word; Replace all fixes a misspelled name throughout the transcript in one go.
With AssemblyAI and Deepgram each sentence has a label (Speaker A, Speaker B…). In the Speakers panel type the real name: it appears everywhere, including exported files. You can change a sentence’s speaker from the menu next to its time, add more speakers or assign them by hand even when the engine does not recognise them.
Save the project to continue editing later and export the text in the format you need.
Save (⌘S / Ctrl+S) creates a .v2t file with the transcript, your edits and the speakers’ names. Reopen it with Open transcript (⇧⌘O / Ctrl+Shift+O) or by dropping it onto the window. ⇧⌘S saves under another name.
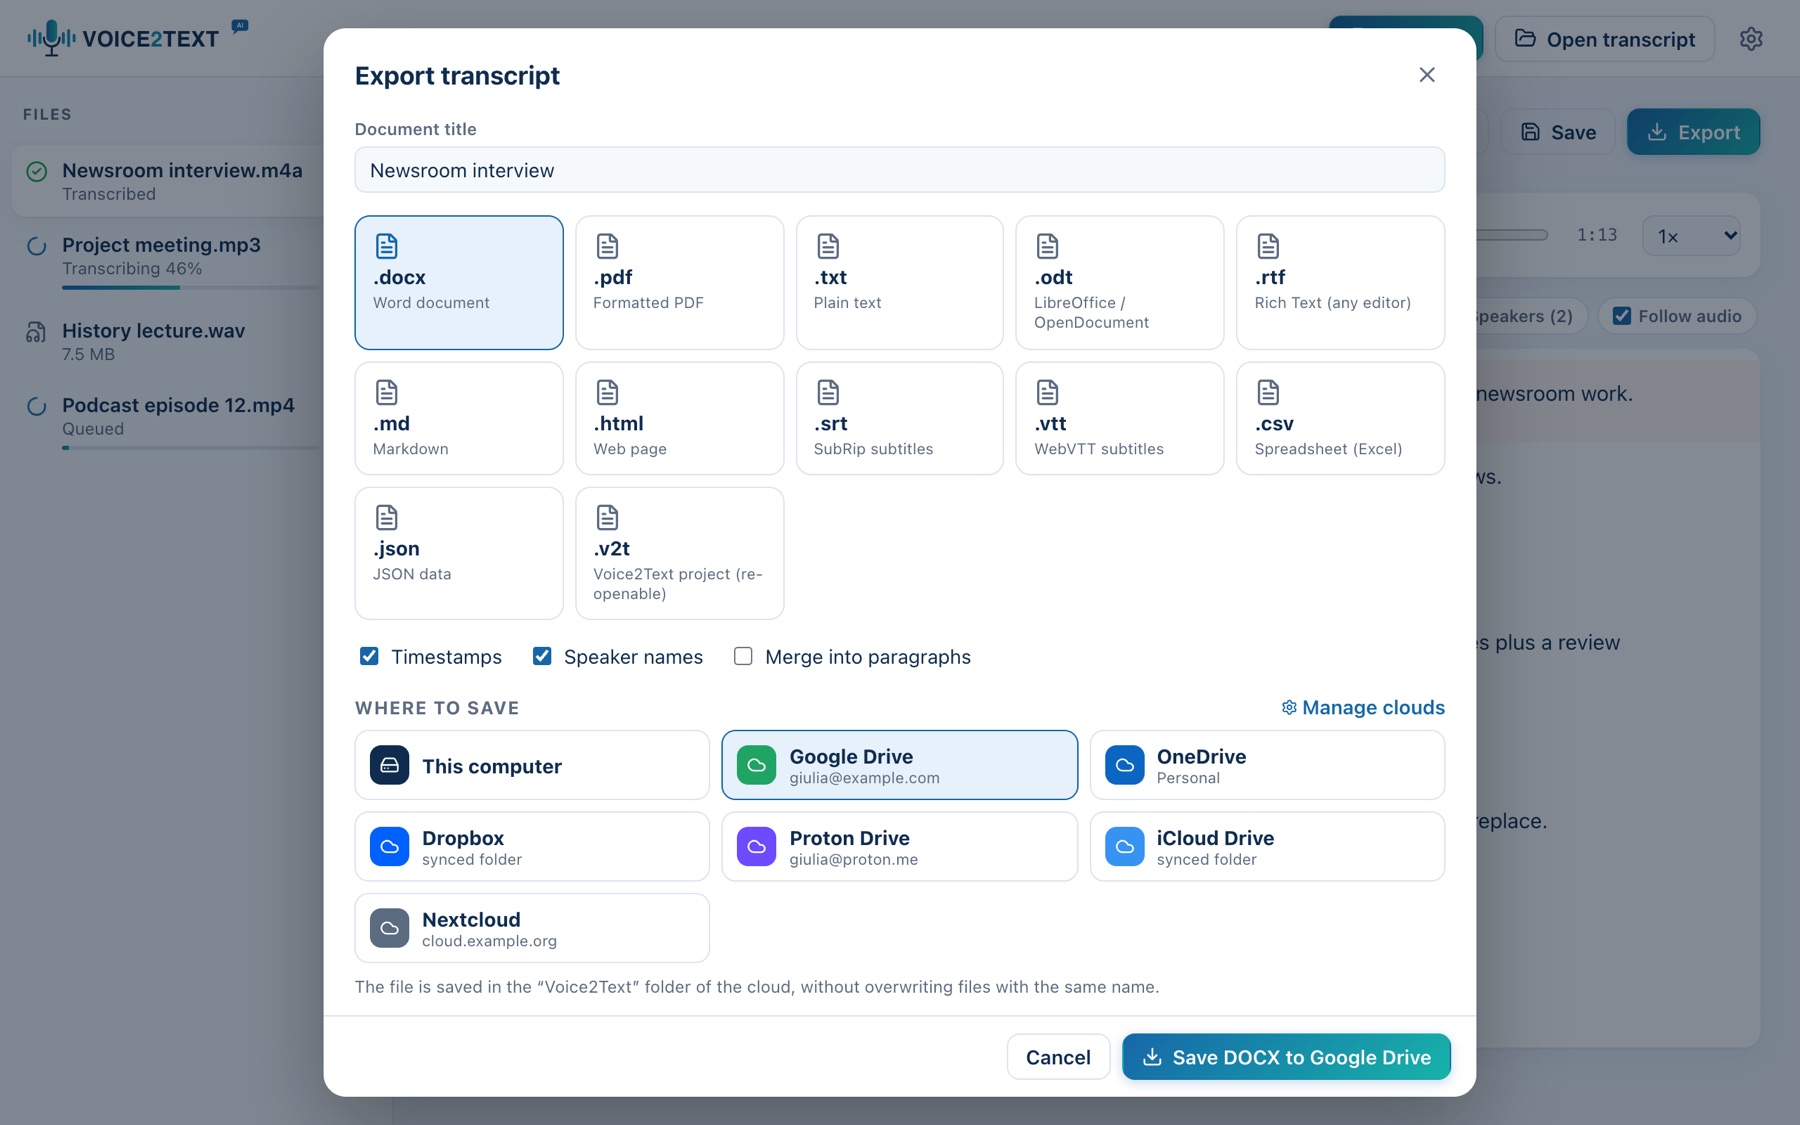
Press Export (⌘E / Ctrl+E), type the document title and choose the format:
| Format | Best for |
|---|---|
| .docx Word · .odt LibreOffice · .rtf | documents to edit, laid out with title and recording details |
| documents to print or send; created through the system print dialog (“Save as PDF”) | |
| .txt · .md · .html | plain text, Markdown, web page |
| .srt · .vtt | video subtitles (YouTube, Premiere, DaVinci, VLC…) |
| .csv · .json | spreadsheets (Excel, Numbers) and data for other programs |
| .v2t | the re-openable project, which you can also save to the cloud |
The options choose whether to include timestamps, speaker names and whether to merge sentences into paragraphs. Arabic and other right-to-left text is laid out correctly.
Voice2Text saves files straight into your cloud using the folders that the services’ apps create on your computer. You do not need to connect accounts or enter passwords.
When you install the app of Google Drive, OneDrive, Dropbox, Box, Proton Drive, iCloud Drive, pCloud, MEGA, Nextcloud or Sync.com, a synced folder appears on your computer. Voice2Text finds it by itself: in the Export window, under Where to save, choose the cloud and press the button. The file is written into the Voice2Text subfolder and the service’s app uploads it right away.
.v2t project.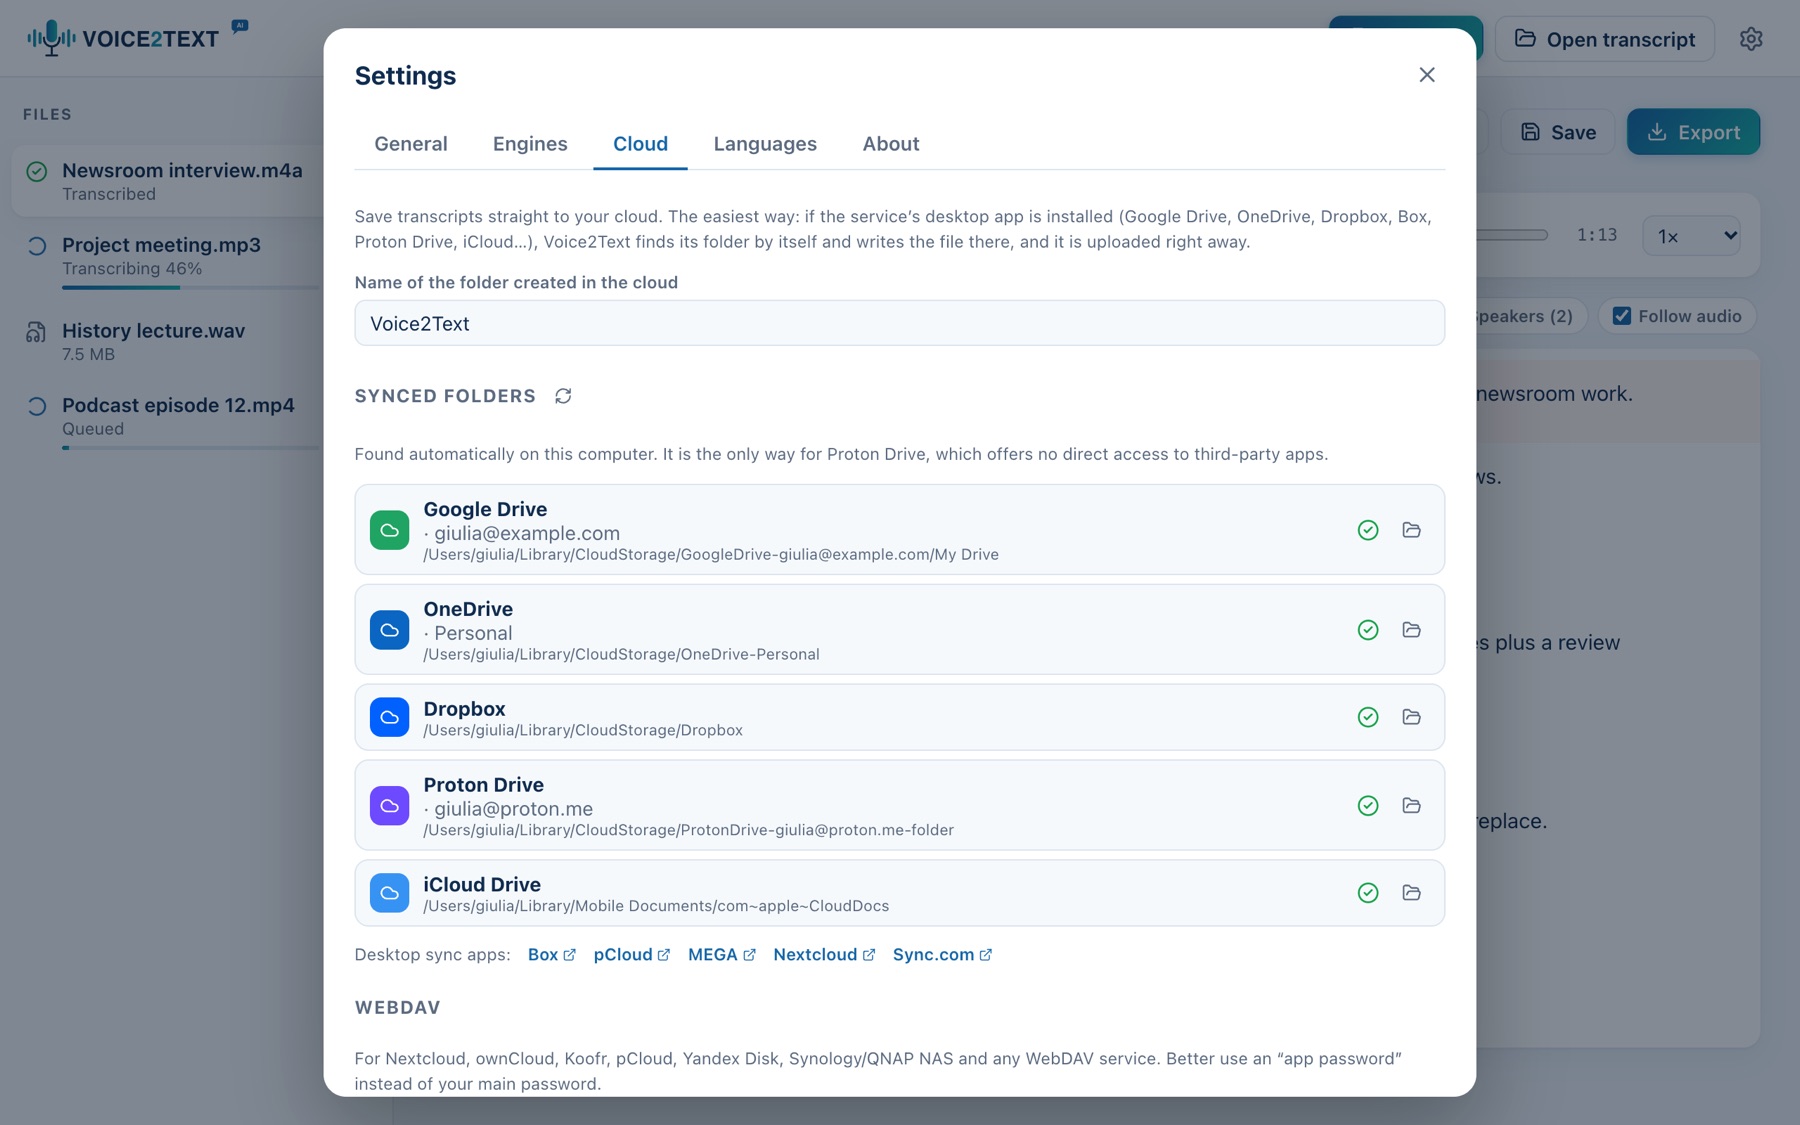
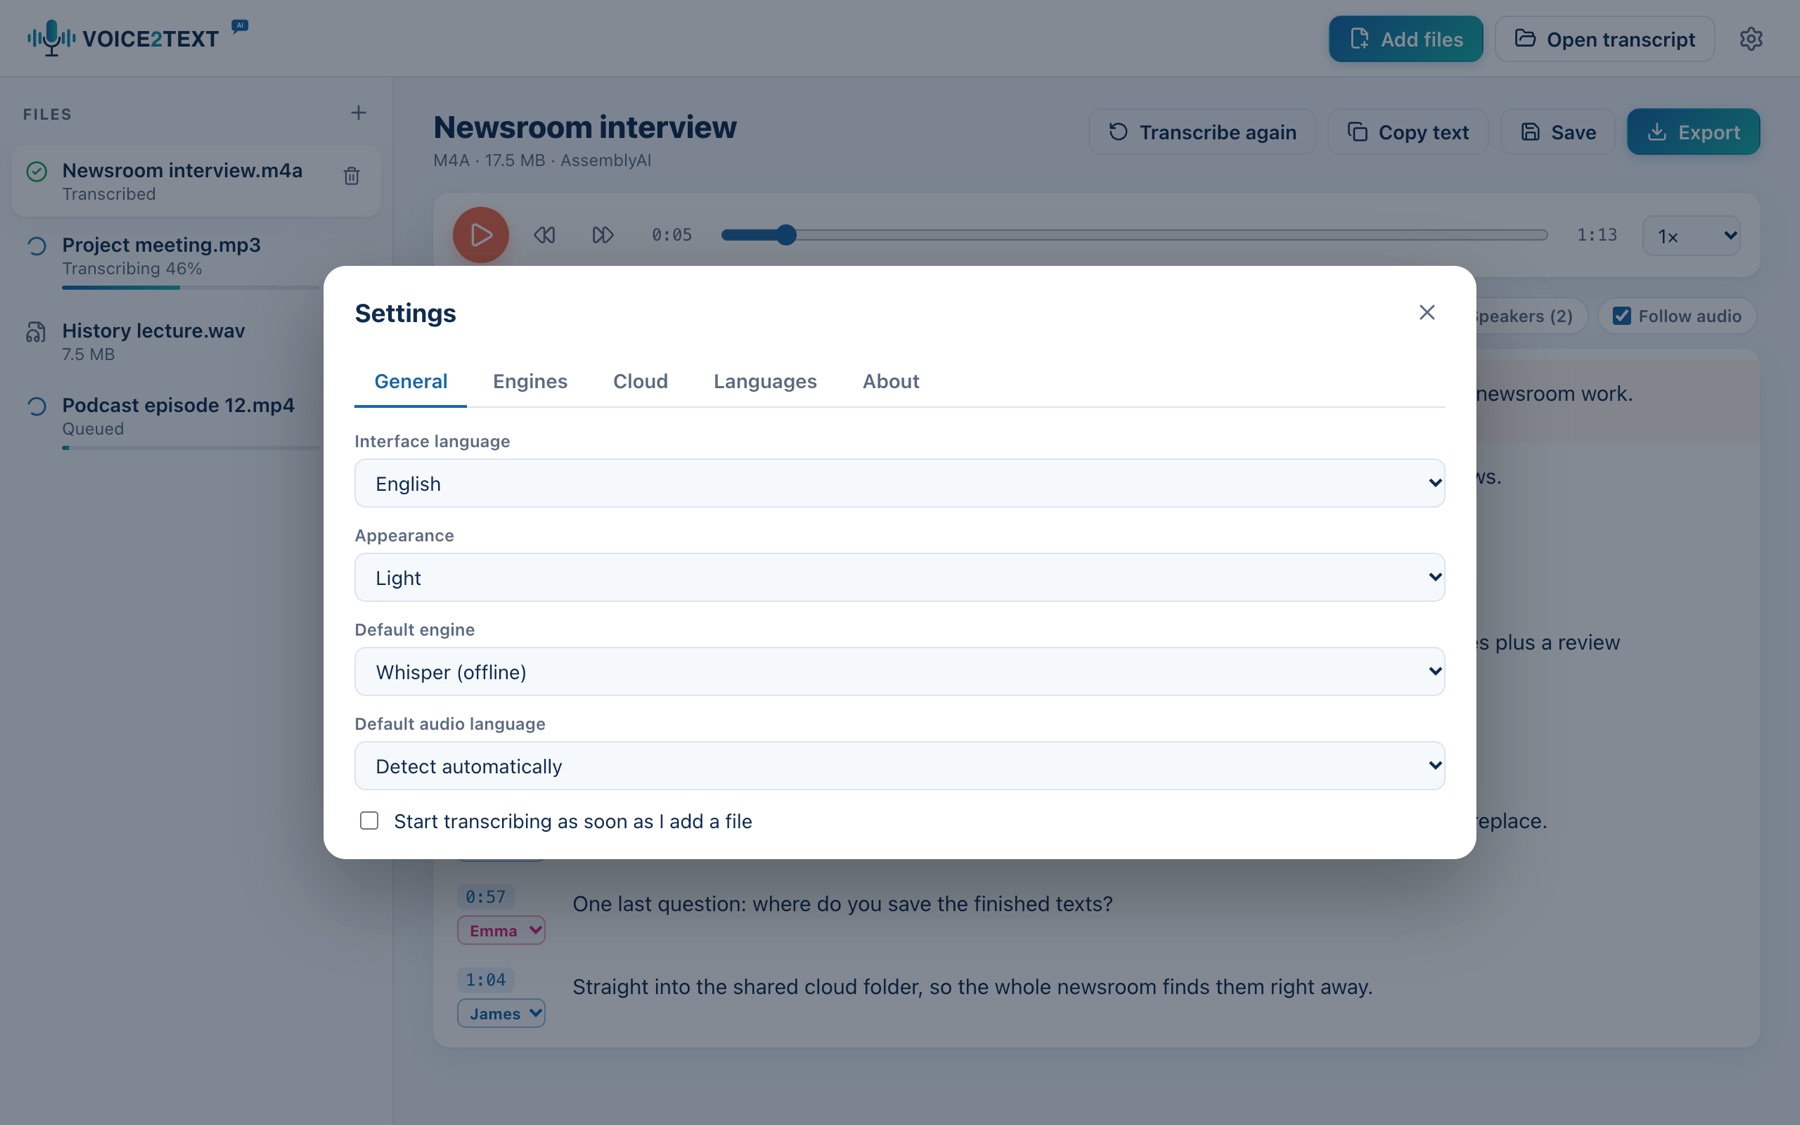
Voice2Text).The gear at the top right (⌘, / Ctrl+,) opens the settings.
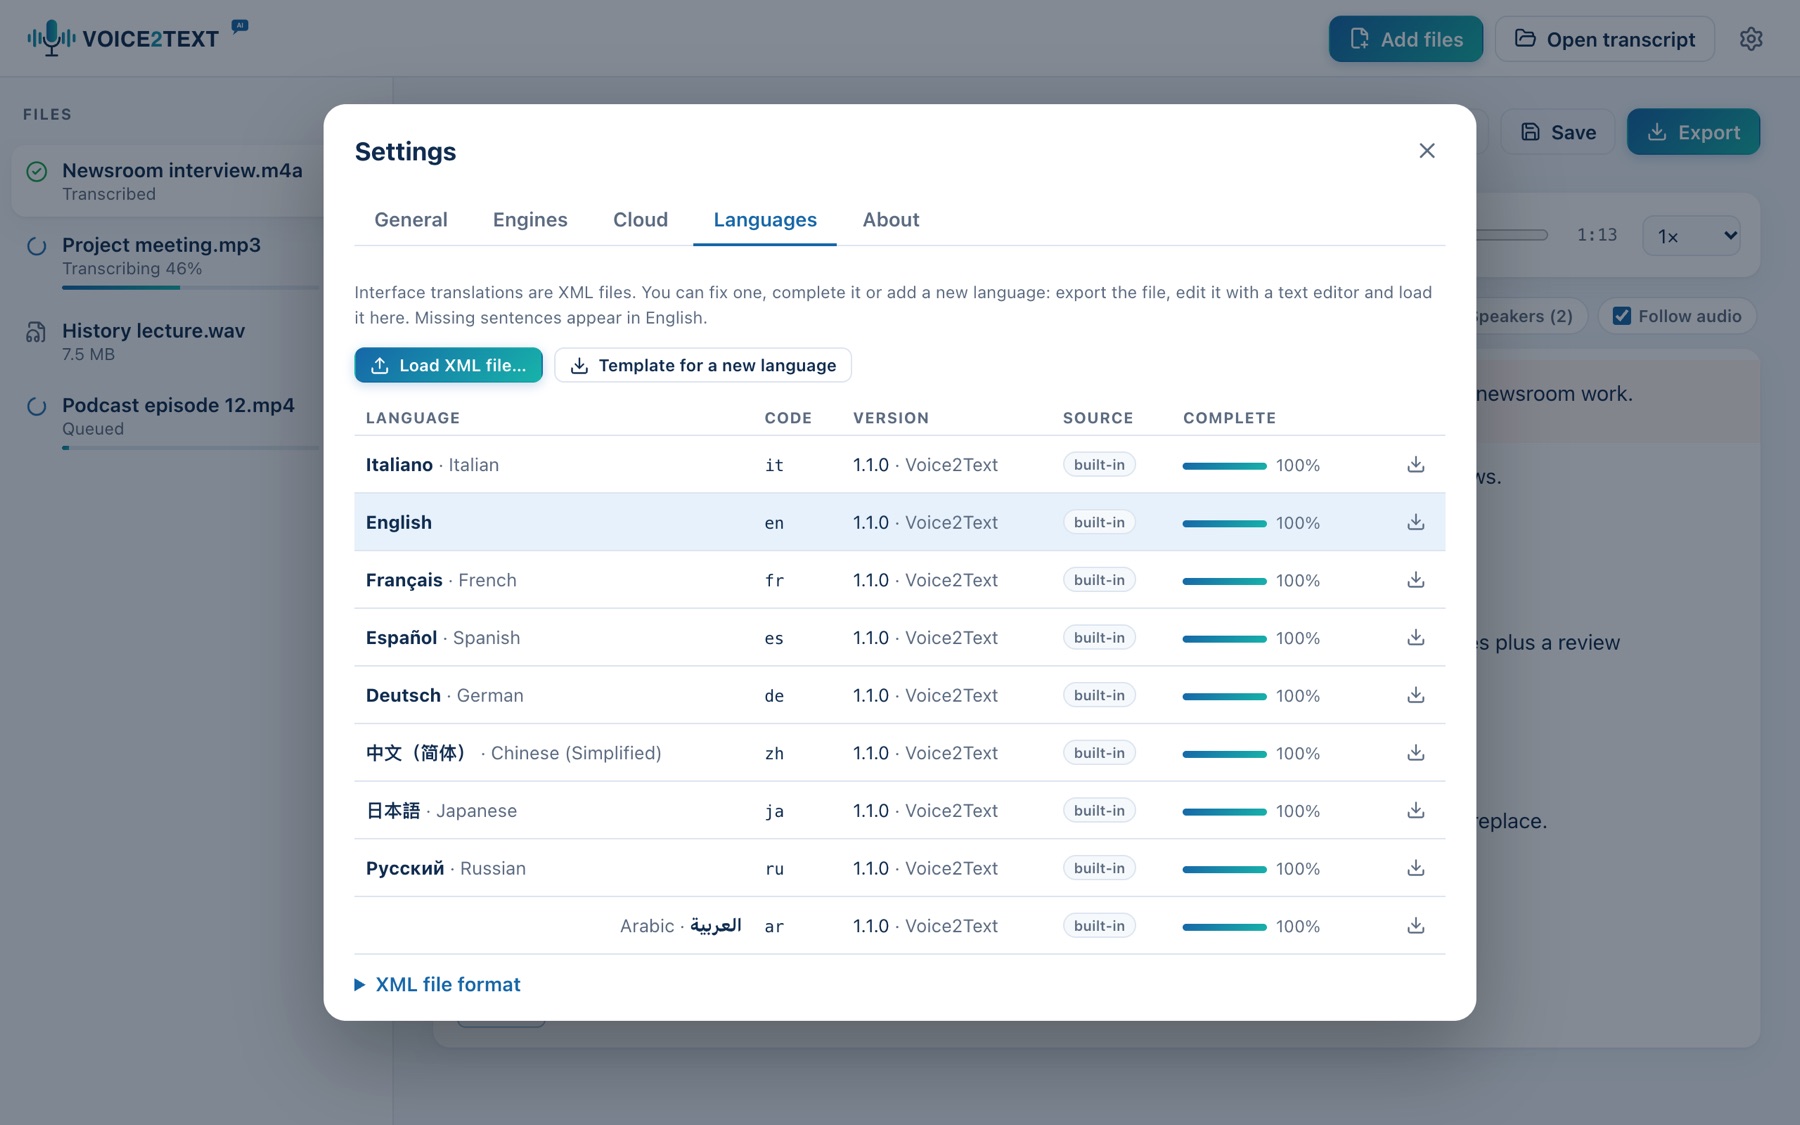
Each interface language is an XML file. To fix a translation or add a new one:
key attributes and curly-brace placeholders such as {n} unchanged.<language code="pt" name="Português" english="Portuguese" dir="ltr" version="1.0">
<string key="app.addFiles">Adicionar ficheiros</string>
<string key="progress.piece">parte {i} de {n}</string>
</language>
A file with the same code as a built-in language replaces it (for corrections); you can always go back to the original. Missing sentences appear in English; the Complete column shows how many are translated. For right-to-left languages use dir="rtl".
On Windows and Linux use Ctrl instead of ⌘.
| Keys | Action |
|---|---|
| ⌘O | Add audio or video files |
| ⇧⌘O | Open a saved transcript (.v2t) |
| ⌘S · ⇧⌘S | Save · Save as |
| ⌘E | Export |
| ⌘F | Find and replace |
| ⌘, | Settings |
| Space | Play / pause (outside the text) |
| Enter · Shift+Enter | Split sentence · Line break in sentence |
| Backspace at sentence start | Merge with previous sentence |
| Esc | Leave the text · close the open window |
Answers to the most common questions.
Install ffmpeg (Installation chapter) or use AssemblyAI or Deepgram, which accept any format because they receive the original file.
Choose the Base or Tiny model in Settings → Engines. “Large turbo” is the most accurate but takes time without a graphics card. For long files Groq is much faster.
Set the audio language instead of automatic detection and use Transcribe again.
Check the key in Settings → Engines: copy it again from the service’s website, without spaces.
Make sure the service’s app is installed and syncing, then press Search again in Settings → Cloud. Alternatively add the folder by hand.
The original audio file was moved or renamed after the project was saved. The text is still available; to listen again, put the file back where it was.
Only on your computer, in the app’s settings file, readable only by your user. They are never sent to Voice2Text.
From voice to text, in any language.
Voice2Text is a program by overminder. PolyForm Strict 1.0.0 licence: non-commercial use allowed; redistribution, modifications and derivative works not allowed.
© 2026 overminder · Version 1.1